This guide takes you step-by-step through the process of setting up a new email account on your iPhone or iPad.
If the Mail account is already set up, but giving errors – then refer to our Troubleshooting guide.
Note: This guide defaults to IMAP and No SSL.
Replace example.com with your domain name
1. Select the settings icon on your home screen
![]()
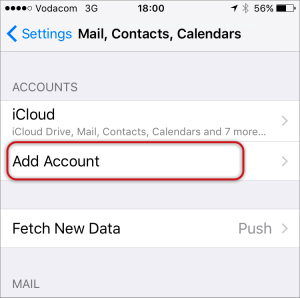
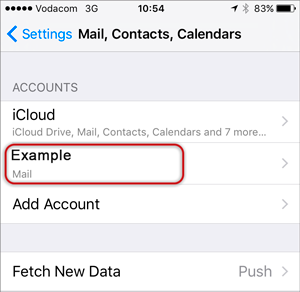
2. Select Mail, Contacts, Calendars

3. Select Add Account…
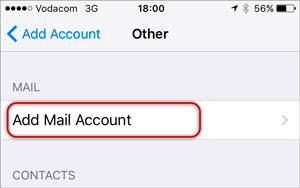
4. Select Other from the menu:

5. Select Add Mail Account
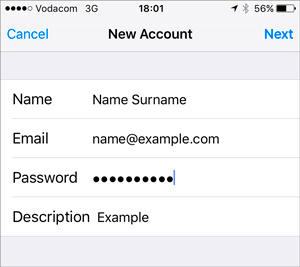
6. Enter your Name, Email & Password > Next
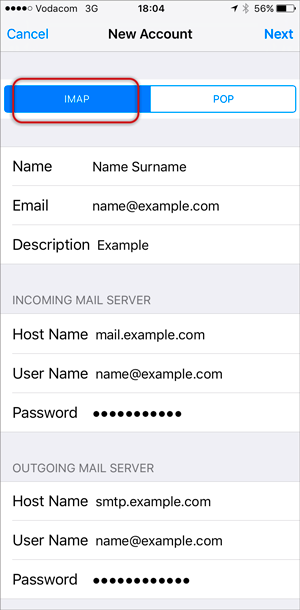
7. Select IMAP
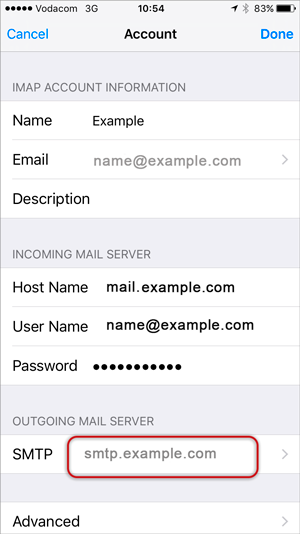
8. Scroll down to Incoming Mail Server and enter all the relevant details,
then do the same for Outgoing Mail Server, as in the screen below and then select Next.
9. You may receive a prompt asking you to verify the incoming and outgoing servers – you can click Continue for each.

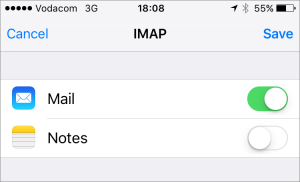
10. Save
11. Choose the new account that you’ve just created
then
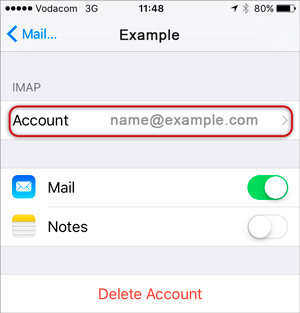
12. Choose the SMTP server
then
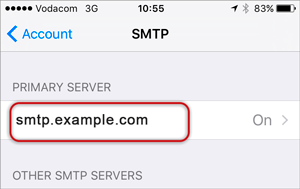
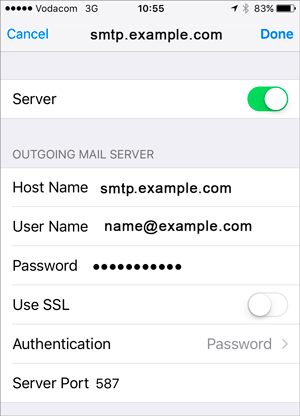
13. Check the SMTP settings:
Congratulations, you have now successfully configured your email account on your iPhone.
Email still not working? Contact us on 021 914 7755.